Access VBA - Working with data
For the purposes of this tutorial, we will cover how to work with data in Access VBA using two methods. These two methods should cover the fast majority, if not all of your needs.
The two methods we can process data in Access using VBA are:
- Recordsets
- SQL
Understanding Recordsets and Configurations in VBA
You can get a more in depth definition of what a recordset is here. Put simply, a recordset can be thought of as a virtual spreadsheet. It allows you to query data with SQL, store it in a variable, and process it in the same way you might run through data in a loop using VBA in Excel.
Let’s work with VBA to create and process our first recordset. In this example, I am going to show you how to reference a library to gain access to a host of coding objects and commands so that we can work with recordsets.
We want to reference code library Microsoft Office 16.0 Access database engine Object Library. In your IDE, you’ll want to click Tools > References and select the library Microsoft Office 16.0 Access database engine Object Library.
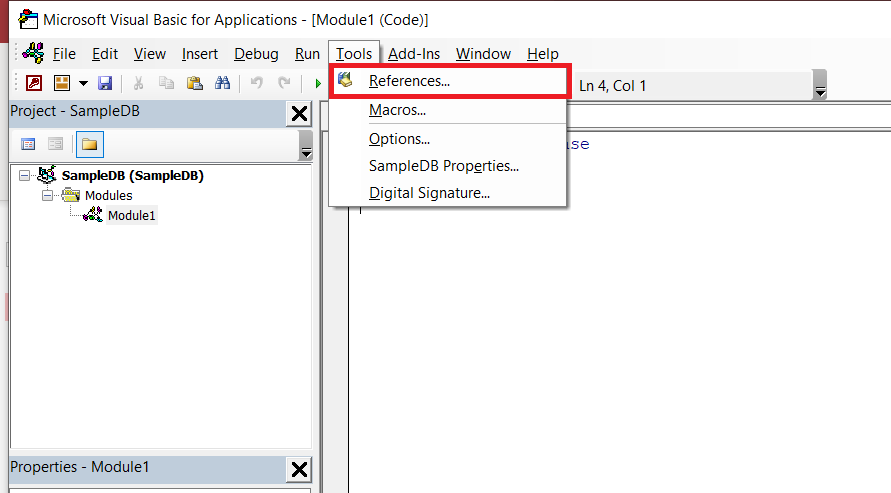

It is completely necessary for you to complete this step. Make sure you’ve done this before moving on. Once you’ve enabled this library, you’re on your way to to working with recordsets.
Create SQL Without Knowing a Line of Code
So remember, a recordset acts like a virtual spreadsheet. You have a set of rows and columns stored in a virtual memory container called a recordset. One way you can create this virtual spreadsheet is through a SQL query. A SELECT SQL query will return rows and columns that you can use VBA to work with. But I don’t know SQL!!! HELP!!!! No worries. I’ll show you how to generate a SQL query using the graphical user interface (GUI) within the Access query designer so you don’t have to code a single word of SQL.
Let’s get to the query designer. Follow the sequence of the images below:
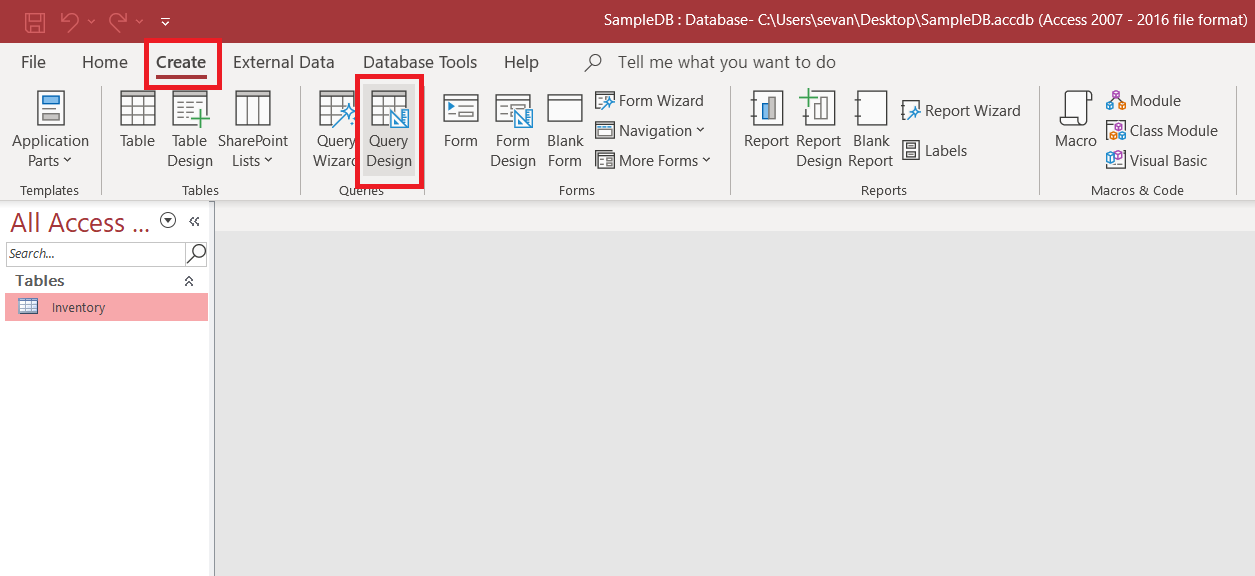
What you’ll see in front of you is the query designer page. Everything will look blank and much of it won’t make sense of ithis is your first time on this page, but we will explain everything and produce an example. This is the place where you will create a SQL query using the graphical user interface to create a query without have to write any SQL at all.
On the left you’ll notice a navigation pane with the tables in your database. In our example, we only have one table called “Inventory.” You’ll need to either double-click that table or click it, hold, and drag it into the blank pane that makes up the majority of the screen. The screenshot below makes things a little easier.
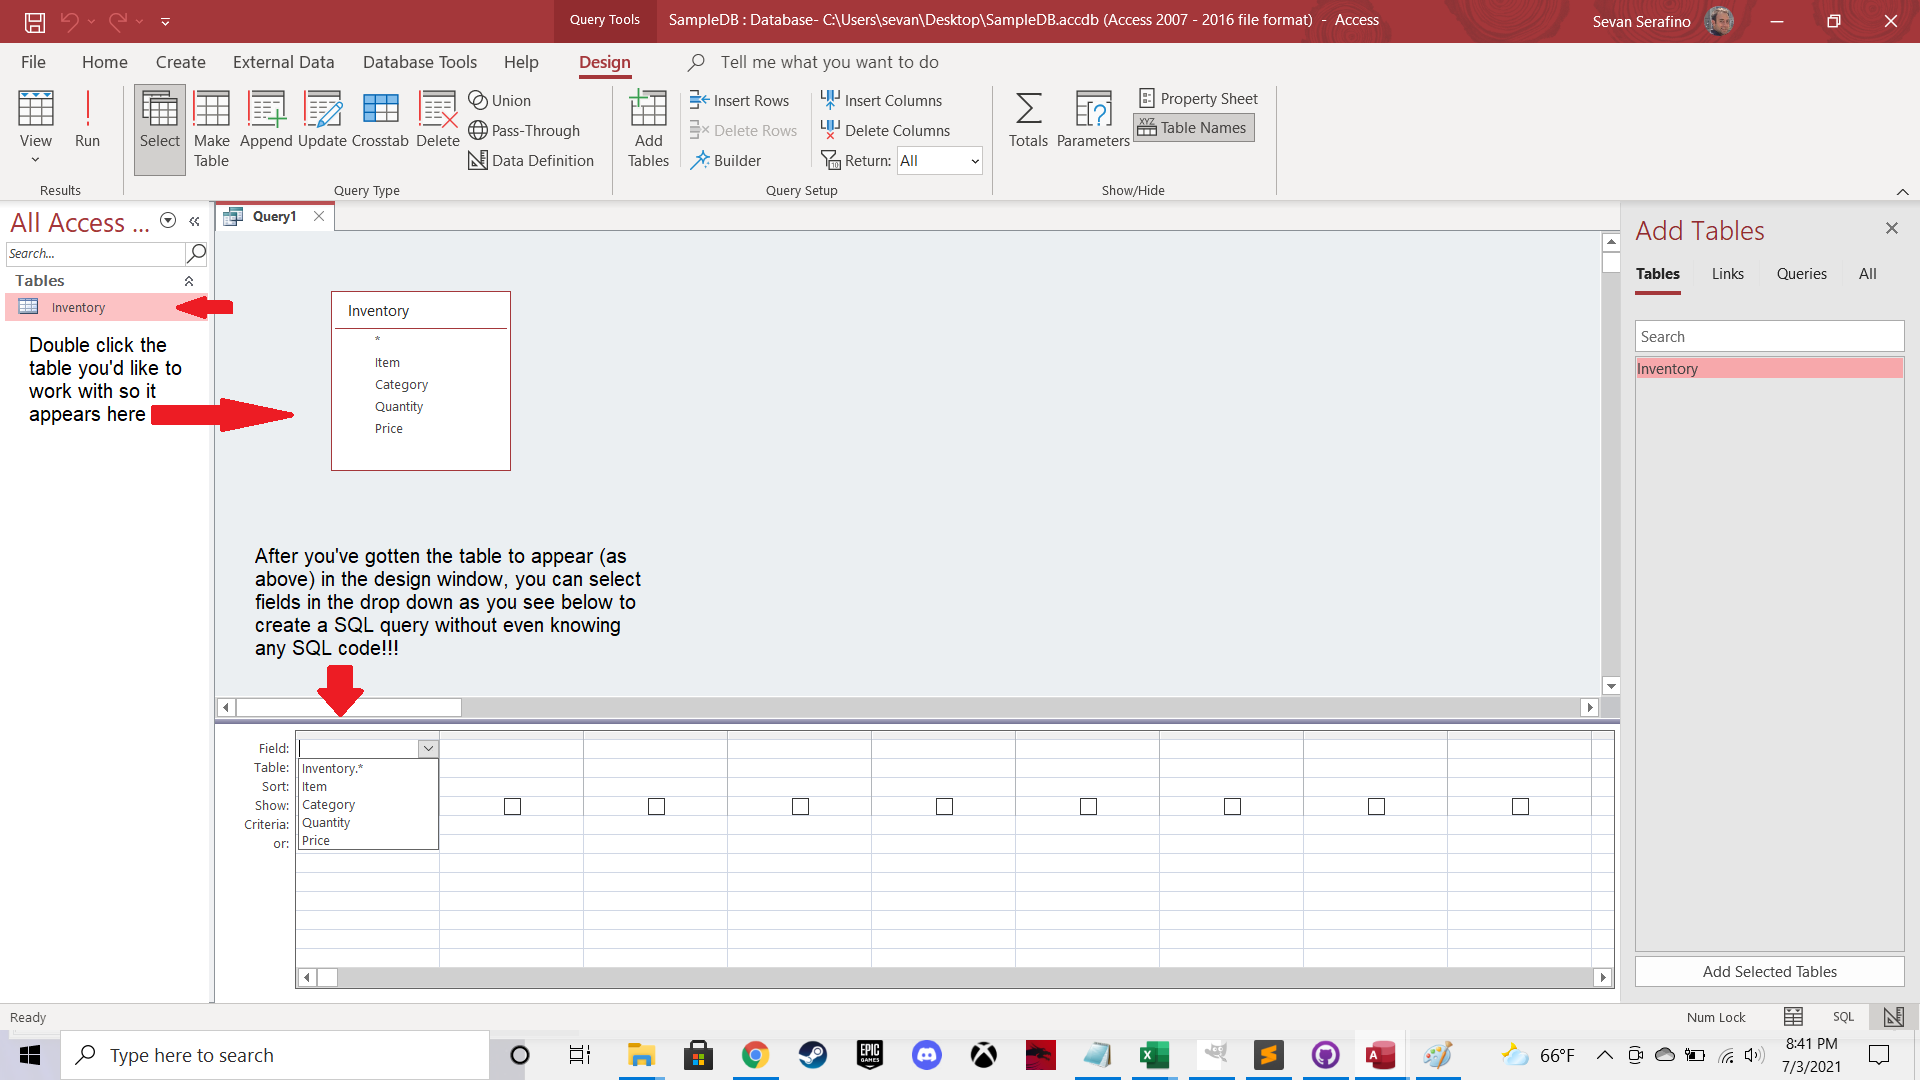
Now that you’ve completed this step, you can begin to use the SQL Designer to create a SQL query. See the red arrow pointing towards a drop down next to a lable named “Field”? This is where you’ll be selecting the columns that you want to return in your recordset.
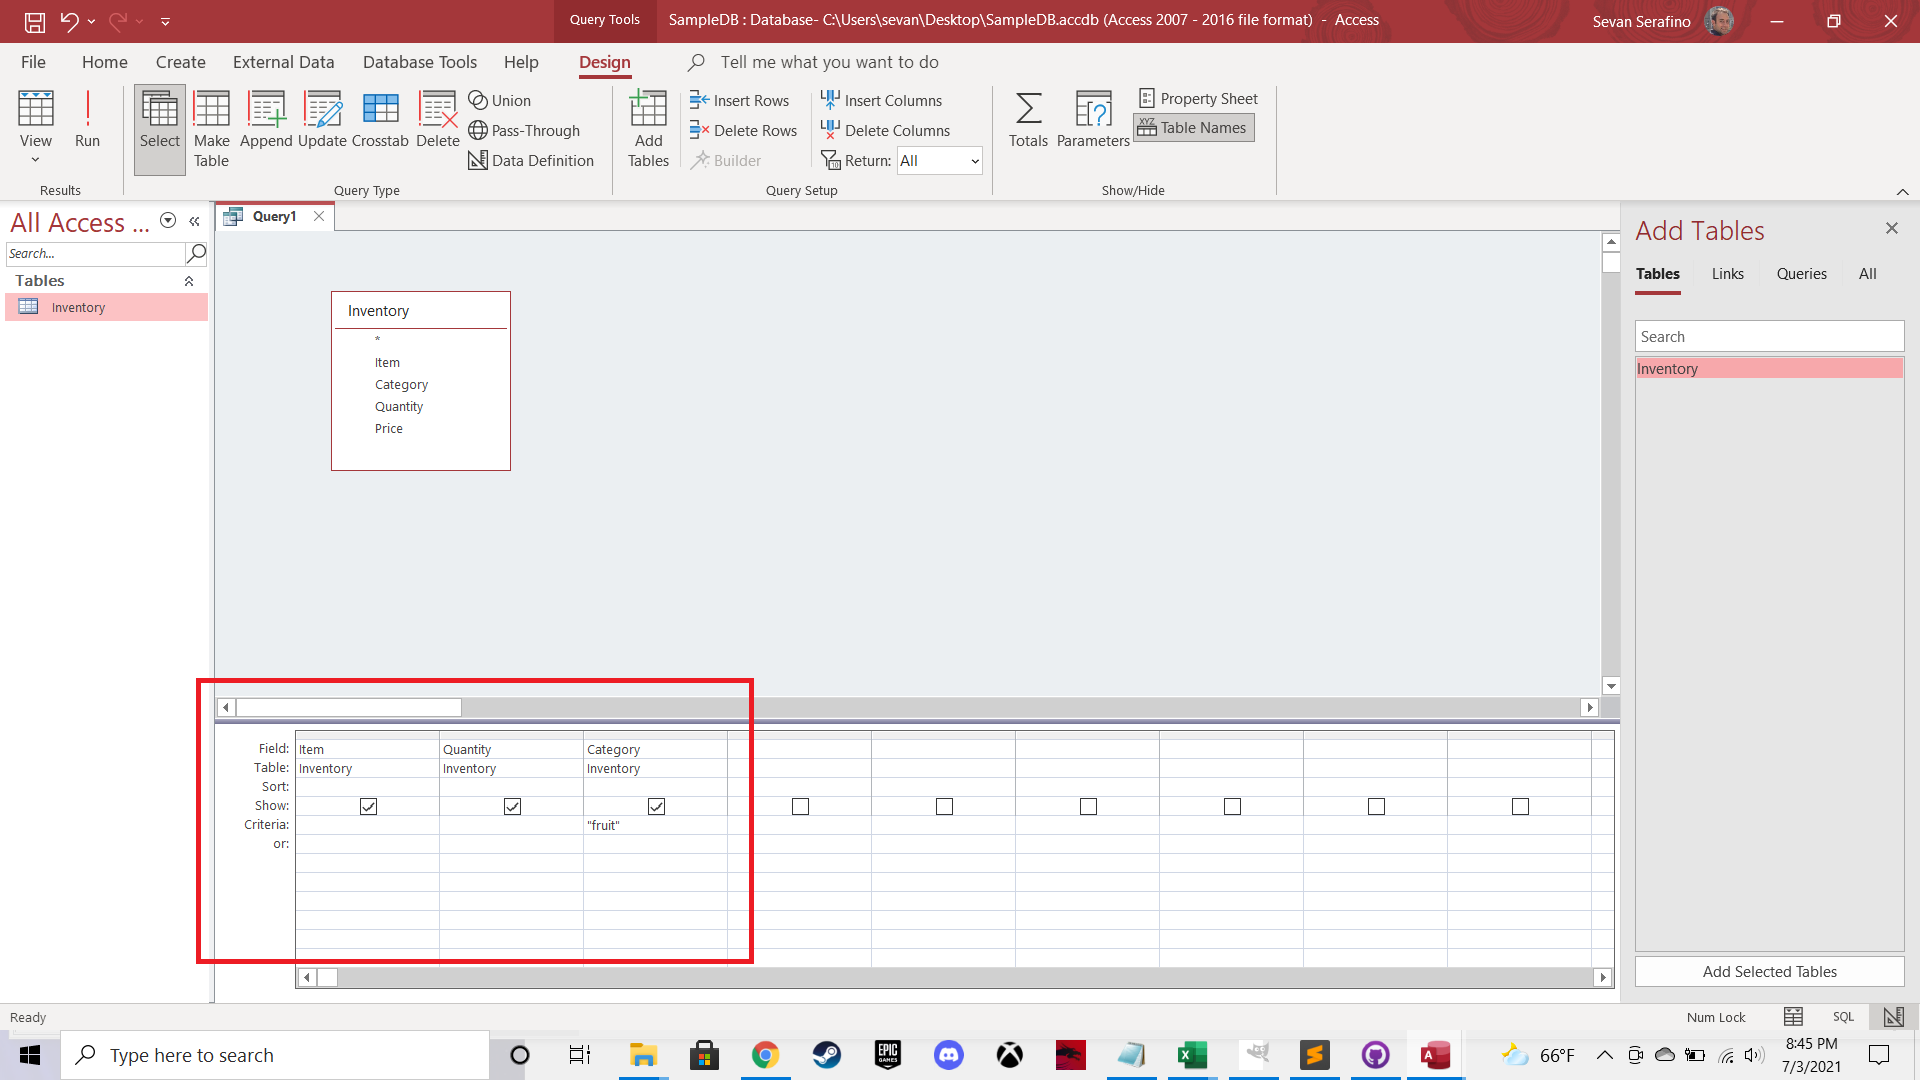
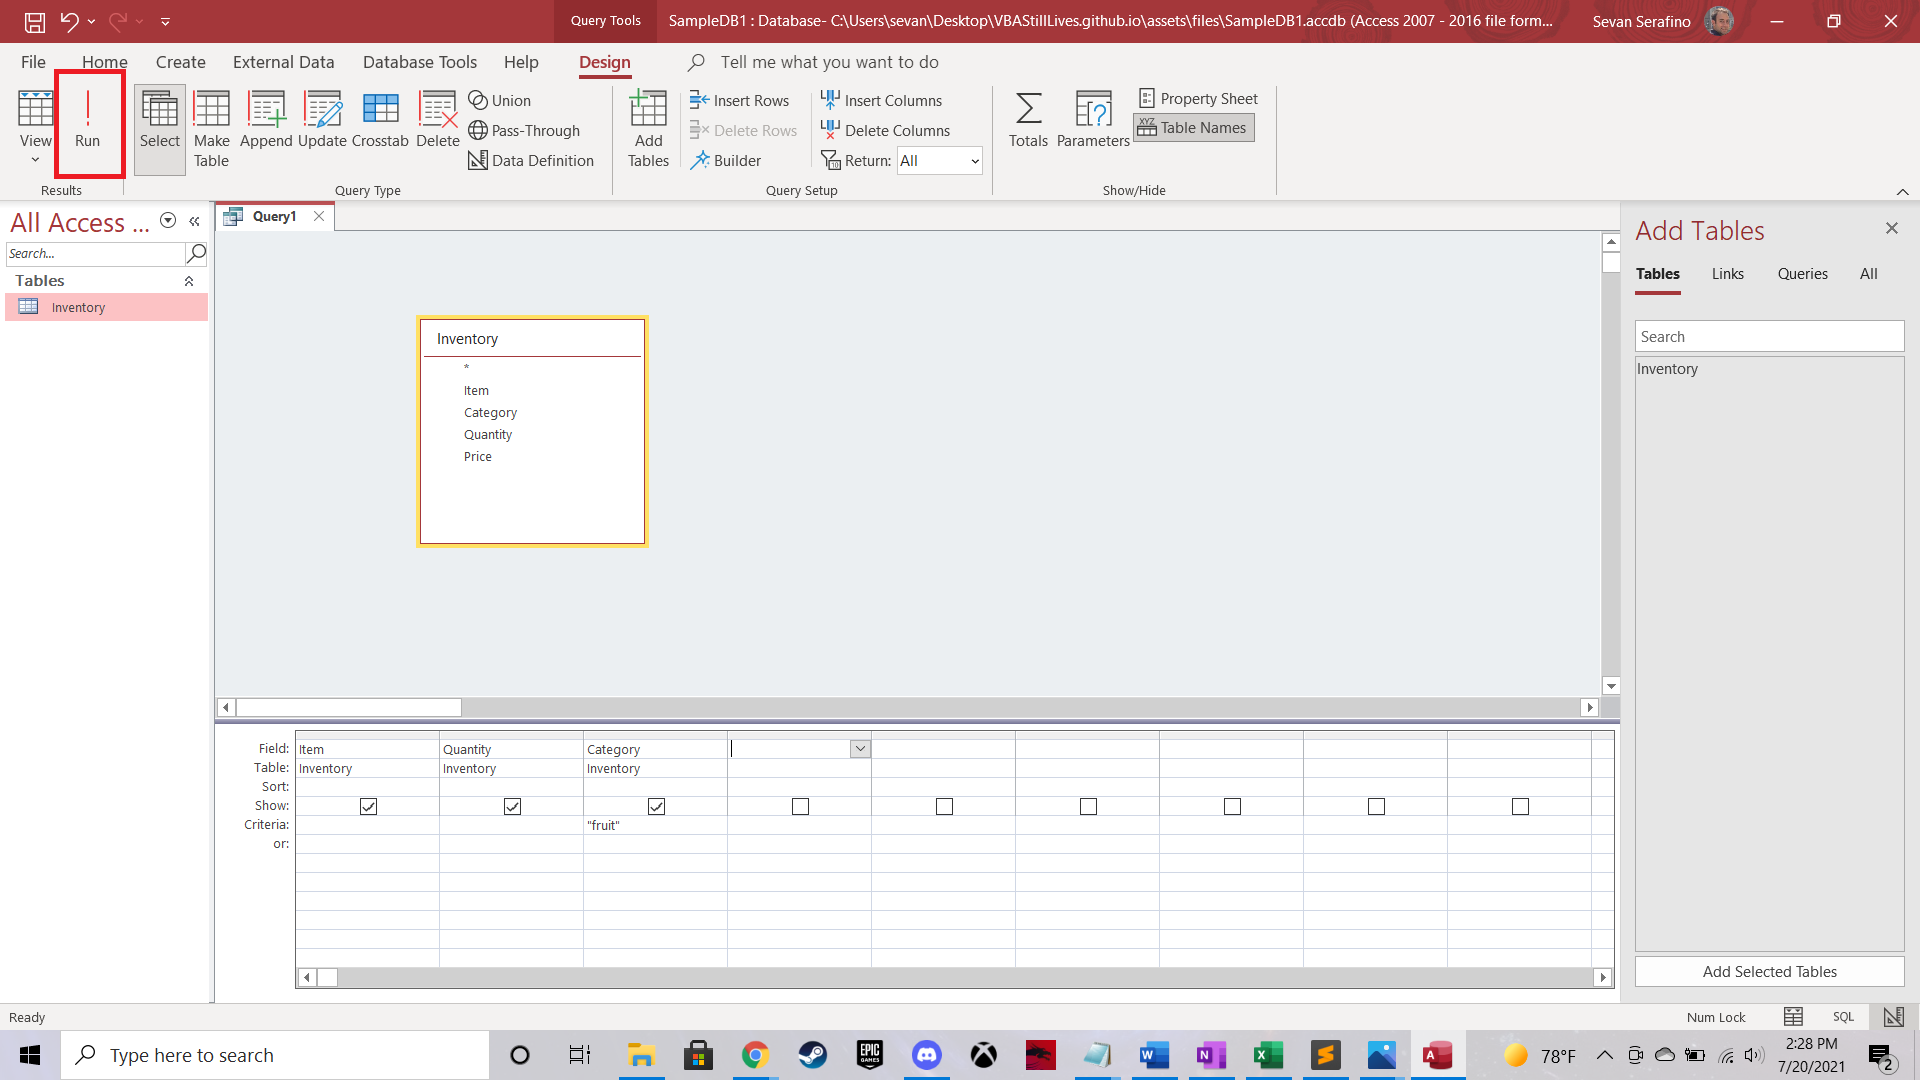
The next step is to create the query. Click the little drop down arrows and select the field that you see in the image below. I’ve also included a filter that I hand typed where you see the text “fruit.” Take your time and try to mimic exactly what I’ve done.
Once you have this completley copied, you can do a quick run of the query to see if it worked. Here’s how you do it.
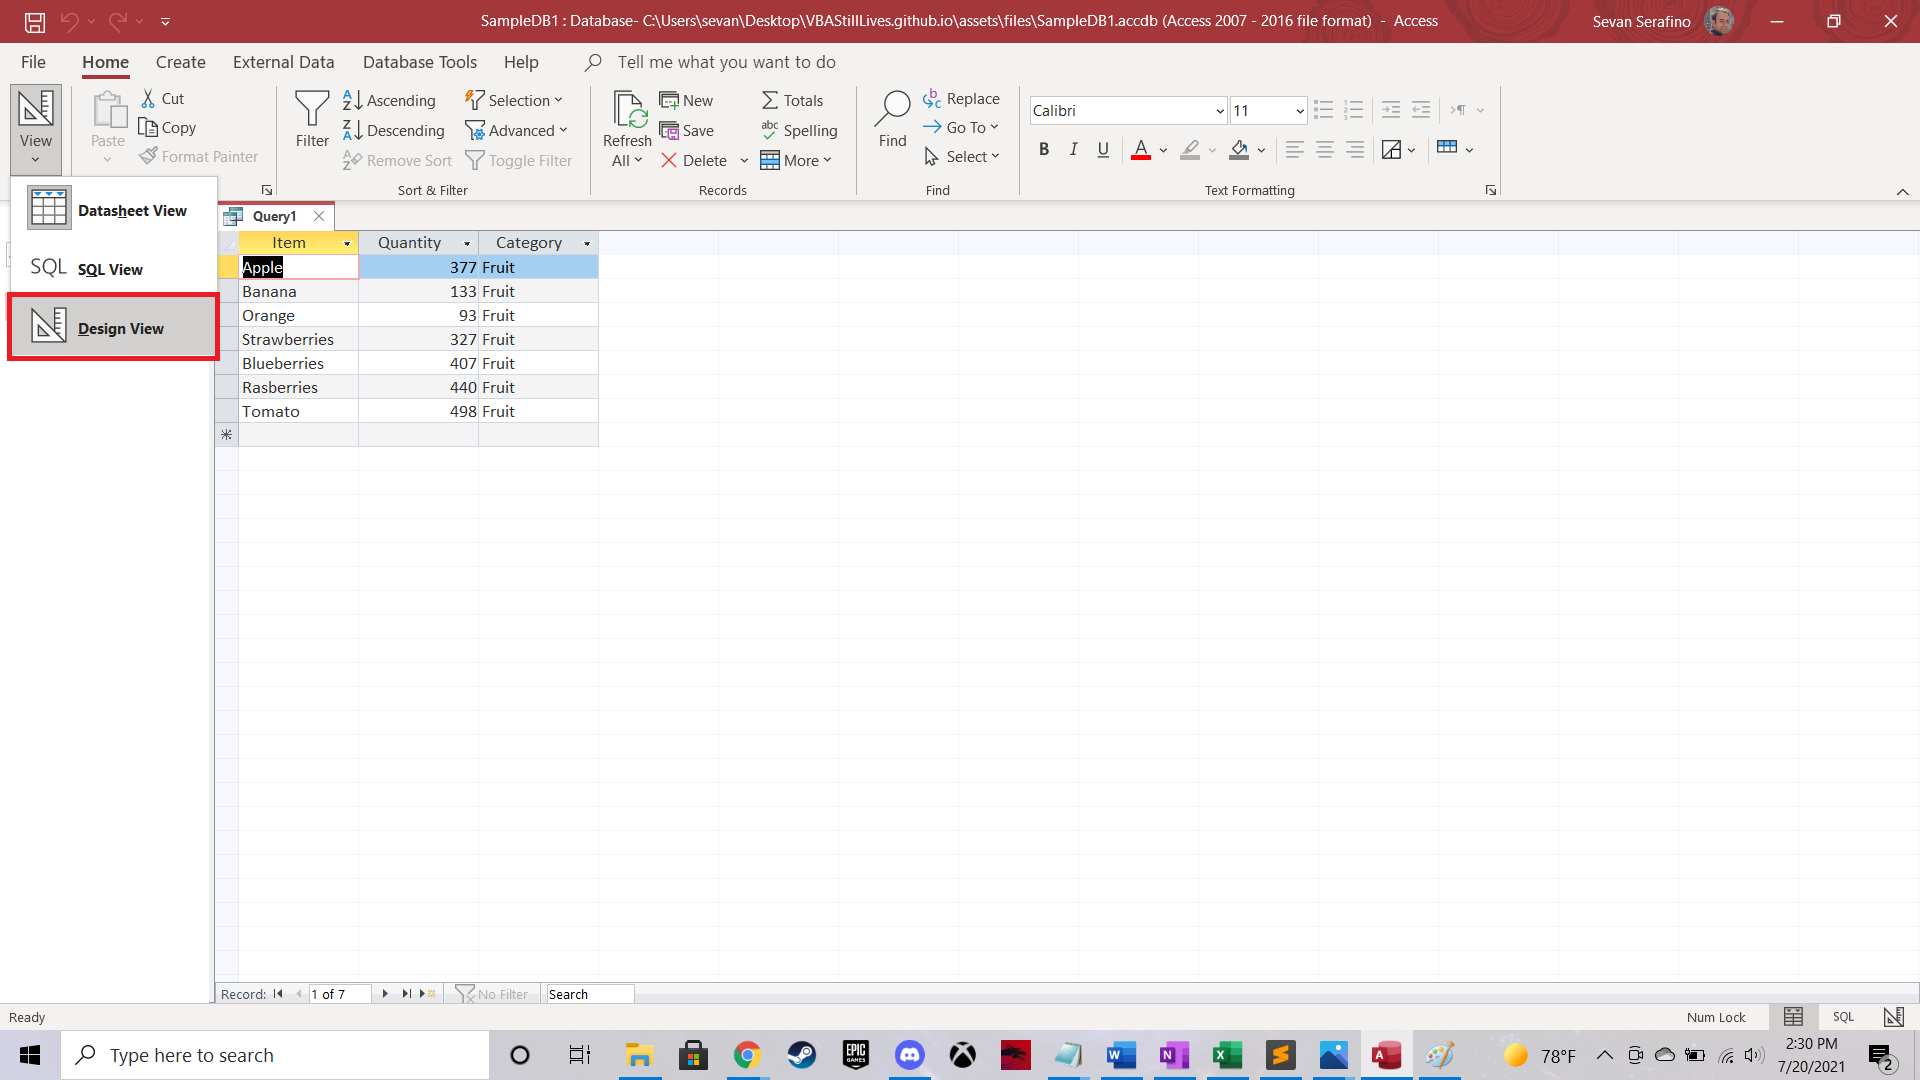
Once you’ve clicked on Run, you should see what appears like a rudimentary Excel spreadsheet. These are the results of your SQL query. This means that the SQL query is running without any technical errors and allows you to quickly browse the data to see if it’s pulling back what you expect it to. This data you’re seeing will also be your recordset! So by checking this out, you can get a quick visual of what your recordset will look like when VBA is working through it programmatically.
As long as everything checks out, let’s get back to where we were, the query design view. See the image below on how to do that.
Important note: copy / paste the results to an Excel spreadsheet. I’ll tell you why later!
At this point, we are not prepared to get the SQL code that was generated from the query we created in the Query Designer. We need to navigate to View as SQL. The image below shows you how.

You should arrive at the following screen:
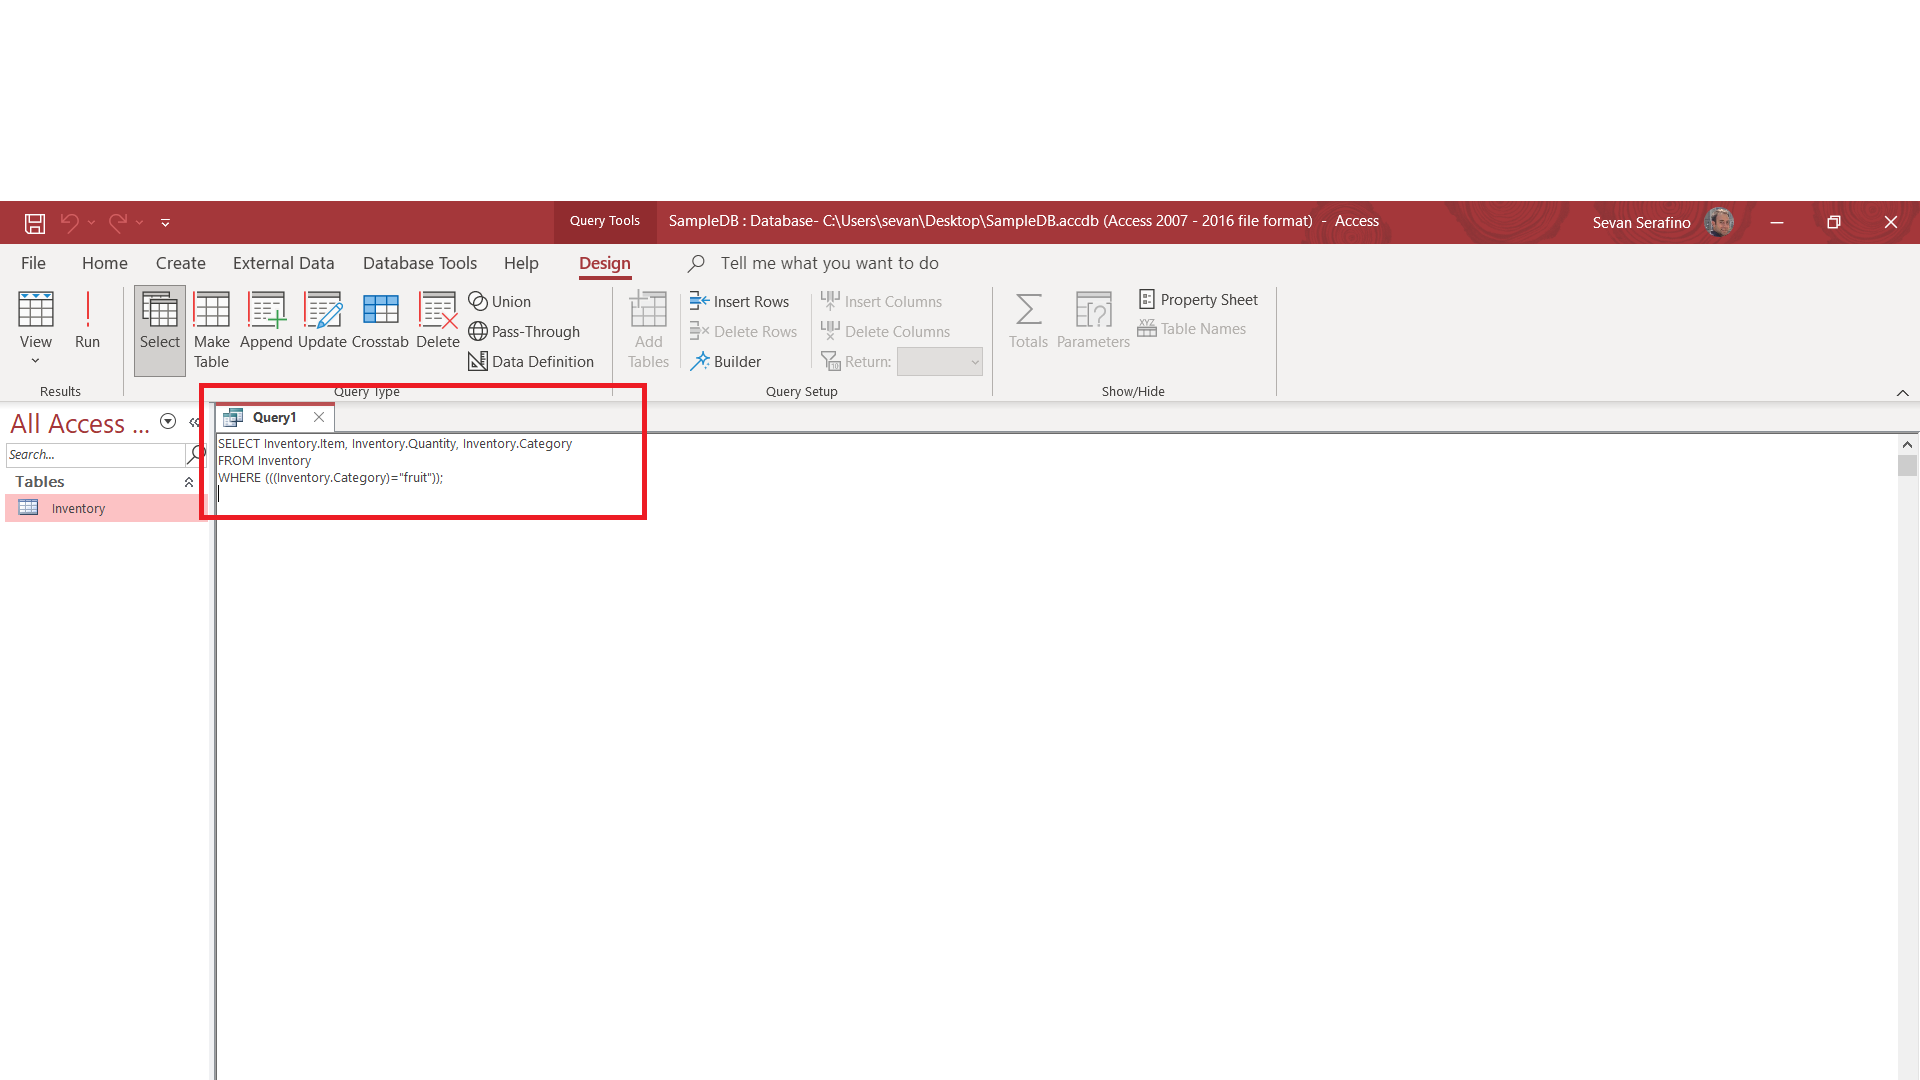
Voila!! You now have the SQL code that will help you generate your code-derived recordset in VBA.
As an important note, you can use Access to help you generate SQL for a wide variety of purposes. Sometimes even experienced developers get stuck and have hard time remembering or finding what they are looking for. This can definitely help fill in the gaps and propel your SQL knowledge as you learn the language and become more proficient in Microsoft Access.
Piecing it all Together - Working with Recordsets in VBA
Now that we have our SQL code ready to go, we can go back to our IDE where we code VBA to finish this tutorial.
Remember you can navigate to your IDE using the manual steps outlined at the beginning of this tutorial, or simply press ALT + F11.
Create a module in your IDE by navigating to Insert > Module, then enter this code.
Important note: this code works the way it does after you have referenced the library Microsoft Office 16.0 Access database engine Object Library outlined in the very first portion of this lesson. Scroll up for more info. If you haven’t completed this step, please do so now.
Sub RecordsetSample()

Dim db As DAO.Database
Dim rst As DAO.Recordset
Dim strSQL As String

'set the db variable to "this" database
Set db = CurrentDb


'define the strSQL variable.  Notice the redunant double quotes around the word ""fruit"" - this is necessary because of VBA.  SQL
''will require the use of a single set of double quotes in SQL itself.  In order for VBA to recognize the quotes as a character itself, it requires
''the use of double quotes
strSQL = "SELECT Inventory.Item, Inventory.Quantity, Inventory.Category FROM Inventory WHERE (((Inventory.Category)=""fruit""));"

'define recordset using the SQL query we've developed
Set rst = db.OpenRecordset(strSQL)

'this line of code ensures that we are on the first record in the recordset
rst.MoveFirst

Do Until rst.EOF
    'print the results of the "Item" field in the immediate window - notice the syntax for how you refer to a column in your recordset
    Debug.Print rst![Item]

    'if the quantity of a particular item is over 400, increase the quantity by 10%
    If rst![quantity] > 400 Then
        rst.Edit
        rst![quantity] = rst![quantity] * 1.1
        rst.Update
    End If

    'this is essential--this single line is how you iterate in a loop through each row in a recordset, and how you avoid your computer crashing
    ''because of an infinite loop!!
    rst.MoveNext
Loop

'clear memory of your object variables - at the very least, it's a good practice
Set db = Nothing
Set rst = Nothing

End Sub
Now let’s step through this code. Press F8 so the code goes line by line. You won’t see much happening as most of the code is being processed in the background.
This code processes the Recordset, which is defined by the data encapsulated in the SQL query we produced earlier, in a loop and produces two visual results:
-
It prints in the Immediate Window whatever is in the [Item] column. This is just to show you how the recordset loops through rows.
-
It will change each price where the quantity of a particular item is >400 by increasing it 10%. Remember something? I had you copy/paste the results of the query run earlier in this lesson? This is why.
Once the code has completed processing, open the table by double clicking it and copy paste the table near the previous data set you copy/pasted earlier into an Excel spreadsheet. Compare the prices. You’ve effectively updated the prices in the table using VBA.
Note: please read the comments in the code. There is a bunch of code-specific documentation and comments that are very useful, and in some cases, necessary for your understanding of the code sample.
What You’ve Learned
Working with recordsets allows us to process data in Access in a myriad of ways. We printed results to the Immediate Window and updated specific records in a table, but there is so much more.
A brief recap of what we covered in this lesson:
-
Setting up our IDE so that we can access the Recordset object in our code by referencing the Microsoft Office 16.0 Access database engine Object Library.
-
Generate a SQL query using the Query Designer in Microsoft Access - allows you generate SQL queries without knowing code!
-
How to code in VBA and work with recordsets to capture and manipulate data
Navigation